Wednesday, March 26, 2014

Customize Webi Application for User Group in CMC

BO 4.1 provides a new feature to customize the entire webi application based on the user group. This means we can give access or restrict user group for User Interface Elements, Features and Extensions of webi.  This is really very good feature for those Administrators who wants to give limited access to Users. I will show you how to customize the webi application below:
  1. Logon to CMC
  2. Right click on the user group and select customization option to customize the webi for this user group.

  1. Again select the customization from the left pane.
  2. On the right side we can see three tabs as shown in the picture.
  1. User Interface Elements
  2. Features
  3. Extensions


  1. By default you can see the User Interface Elements tab is selected and all the options are checked.
  2. Uncheck the options you want to hide from the user group, so that the users with in this user group will not be able to see the unchecked  User Interface Elements. This way we can hide the various components of webi from users.
  3. Click Sava&Close.
  4. Now when the user logs in the unchecked options Properties Tab and Page Setup tab are hidden from the users of this user group.

In the above picture Properties Tab and Page Setup tab are hidden.

Tuesday, March 25, 2014

SAP BIBO Integration

This picture gives you a good understanding of how different tools of Business Objects can be connected to SAP BW.

Thursday, August 2, 2012

Configuring BO 4.0 Mobile Server for iPad

This blog gives answers to most of the question that comes when configuring the BO 4.0 mobile for iPad. Here are some of the questions I had when configuring the iPad to connect to my BO environment. 
  • What should I do to make the reports work on iPad?
  • Should I configure the Mobile Configuration tool?
  • Do I need to configure VAS and VMS servers? If yes how?
  • Do I need to install anything on my iPad? If yes how do I configure?
  • The following blog gives answers to many of the above questions and you will find out how simple it is to configure.
Here I have used business objects 4.0 SP2.
  1. Make sure you have the Tomcat Web Application server installed on the server. If you have installed we can make use of the existing Tomcat server to install mobile server.
  2. T o install mobile server on tomcat perform the following steps.

  1. Stop Tomcat Web application server.
  2. Copy the file MobileBIService.war from one of the following SAP BusinessObject BI platform locations, as appropriate, to [Tomcat home directory]\webapps.
• For SAP BusinessObjects Business Intelligence platform 4.0 SPXX: [Install directory]\Mobile
14\Client
• For SAP BusinessObjects Business Intelligence platform 3.1 SPXX: [Install directory]\ BusinessObjects Enterprise 12.0\java\applications
Note: MobileBIService.war is supported only on Tomcat.
  1. Start Tomcat

  1. Once you start the tomcat, wait for 1 min you will see the MobileBIService folder.
  2. Now we have to configure the categories. A category is a logical classification of BO documents. Documents are assigned to categories and help control the access of Bo documents on mobile.
To configure the categories follow the below steps.

  1. Locate and edit the file: [Tomcat_Home]\webapps\MobileBIService\WEB-INF\mobi.properties.
  2. Add the required categories to the request sources (default or iPad) as shown below
#default
default.corporateCategory=Mobile
default.personalCategory=Mobile
#ipad
ipad.corporateCategory=Mobile
ipad.personalCategory=Mobile
#iphone
iphone.corporateCategory=Mobile
iphone.personalCategory=Mobile

Similarly, we can create categories for android phone, android tablet, blackberry mobile etc.

All the setting on the server are done. Now to test the mobile server installation, open the safari browser on your device and give the url:

http://<ipaddress>/<servername>:8080 
or open the web browser on your PC and enter the below URL

http://localhost:8080/MobileBIService/MessageHandlerServlet?message=GetVersion
you can substitute the localhost with the ipaddress or hostname.

If you see this XML then the war file is configured correctly. 

<?xml version="1.0" encoding="UTF-8" ?>
- <Result status="success">
<version productVersion="14.0.2.565" internalVersion="1.0" />
</Result>

  1. Go to your app store on your device and download SAP Business Objects Mobile App for iPad.


  1. Open the app you downloaded and click on ADD Connection.


  1. In the next screen click on Add a connection as shown below.


  1. Click on Create manually.


  1. Now enter the following details and click done

a. Name: sapdemo (note the name can be anything you want)
b. Server URL: http://server_ip:8080/
c. CMS: server_ip (no port number)*
d. Default: ON
e. User Name: Sapuser
f. Password: password

10. Login using the connection. Here you will see the reports added to your categories.

So finally we don’t need to use mobile configuration tool, VAS or VMS to use mobile server for iPad
Ref: SAP BO Mobile Admin/user guide

Monday, July 30, 2012

My impression of Web Intelligence 4.0

I have been working with Web Intelligence 4.0 and here is some insight into webi 4.0

  • The first thing you will notice in webi 4.0 is the look and feel. there are many tabs instead of menus and tool bars. I did not like as I have to remember about each tab contents. If I don't remember I have to search all the tabs, which is time consuming task.
  • One of  the main feature that is discussed lot is connecting directly to BEx queries using BICS ( Business Intelligence Consumer Service). This helps us to directly connect to BEx query with out the need to create the Universe.
  • We can build reports based on the Universes designed (.UNX ) on Information Designer Tool (IDT)
  • We can also build reports based on analysis views exported from SAP Business Objects analysis Views.
  • We can hide the columns in a block if we need. This becomes handy when we want to sort the table data based on a column that we don't want to see in the report.This feature is not available in the previous versions. Right click on the column in a block and click Hide.
  • We can also dynamically show/hide the entire block based on a formula.You can hide the block when the formula is true, otherwise it will be shown.
  • There are many new charts available in webi 4.0 which are very useful.
    • Pie chart with depth
    • Scatter Chart
    • Bubble Charts
    • Box plot Chart
    • Heat map
    • Tree map
  • We can preview the data in the Query Design screen.
  • We can now copy Queries, variables, tables and charts from on web intelligence document to another.
  • We can now save the Webi document to the new .xlsx format. when we save in .xlsx format we can save the million records in a single worksheet, instead of multiple worksheets as in previous versions.

Wednesday, July 11, 2012

Creating Relational Connection in IDT to connect Infocube

In BO 4.0 BICS is used only to connect BEx queries with business objects.But if you want to connect Infcube you have to create a relational connection to the Infocube.

Here I will be showing how to create a relational connection in Information Desing Tool (IDT)


Open the session of the repository in the IDT. Right click on the any of the connection folder and click on the Insert Relational Connection as show below.

.
In the next window give the Relational connection name and description.
select the SAP Java Connector Driver from the list of drivers and select next
Enter the details of the SAP BI server. and click test connection. if the server is responding, click on the ellipse (circled Red) to select the info provider.
In the next window select the InfoProvider. You can use the filter to see only the infocubes as shown below.

  
 Now select the Infocube and click OK.                                                                                        .click the finish button. You will see a window as show bwlow. click Yes to create shortcut in your local project.


once you are done with creating the Relational connection, create multi source data federator and create universe on top it.

Tuesday, July 10, 2012

Converting .UNV Universe to .UNX Universe

In this blog I will show you how to convert .UNV file created in Universe Design Tool to .UNX file in the Information Design Tool.
Open the Information Design Tool. Go to file and select Convert .UNV Universe as shown below.

In  the next screen you will have the option to select the .UNV universe file from the local file system or from the Repository
.
Click on the folder icon if your UNV file is in you local system.
If your UNV file is on reporsitory click on reporsitory icon. Once you click on the repository icon, a popup comeup. Enter th e username and password.
Click OK. In the next screen you will have a popup, where you need to select the .UNV  file for the conversion


In the next screen select the Destination Repository  Folder and Destination Local Project Folder.

To select the Destination Repository  Folder select the browser button to select the destination folder and Click OK


Now select the Destination Local Project Folder browse botton to select the local project .
click OK. Now select teh two check boxes.
click OK. In the next screen you will see the popup which says Universe published successfully.
Click close. Now you can see the converted UNX file in the local project you selected.
The converted project will have  Connection Layer, Data Federator Layer, and Business Layer.

Thursday, July 5, 2012

Information Design Tool in BO 4.0


Information designer is a new tool in BO 4.0 that features the creation of universes (.unv, .unx) with multiple data sources, which is not available in previous versions of Business Objects.
IDT follows layered approach. The layers are

       Connection Layer.
       Data Foundation Layer
       Business Layer

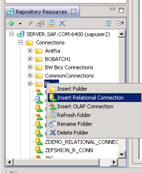
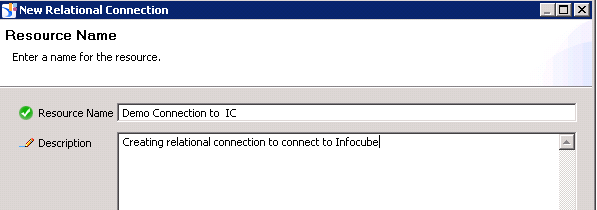
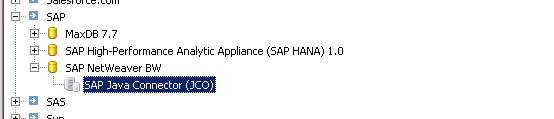
In the connection layer we create the connection string (.cnx) to the data sources. Each data source will have one connection string.

In the Data foundation layer we will create the data foundation file (.dfx) with one or multiple connections.  That means we will be able to bring the tables from multiple the data sources. This layer will contain the joins, contexts, derived tables, alias etc.
Eg: we will be able to access the tables from both SQL and Oracle in a single data foundation.

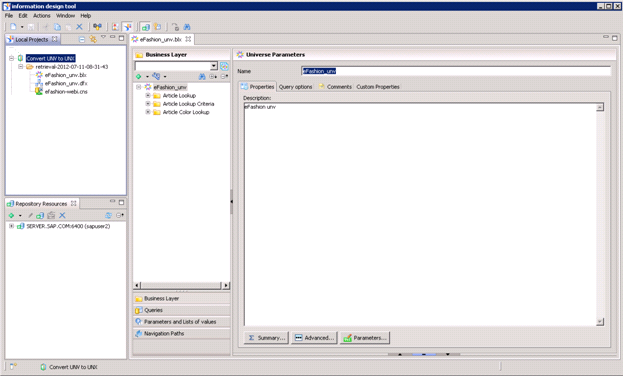
In the Business layer we will be able to create the file (.blx)  will contain the user layer, including objects used to access the data. We publish this business layer and use it as a Universe. So we will be able to create multiple universes on a single data foundation, which will save lot of time.

Here is the pictorial representation of IDT.


Here I am listing some of the pros and cons of IDT.

Pros:
  • Building one data foundation with all data sources and build universes on top of it eliminates the creation of linked universes
  • Can build views on top of Business layer, so that we can have security privileges easily.
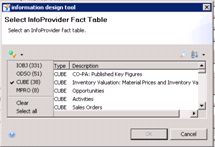
  • We can create Dimensional (OLAP) universes that support OLAP dimensions and hierarchies
  • In earlier version (3.1) if we have a context then every join must be a member of one context. In 4.0, only the joins that are part of a loop need to be in contexts. All other joins will be equally accessible to all contexts.
  • New search feature enables to search tables based on
    • Table Name
    • Column Name
    • Family
    • Context
  • We can add tables too family and color code them. You can import and export those families.
  • Ability to add calculated columns to the Tables in data foundation so it can be used in multiple business layers
  • When creating the calculated column using the tables from to databases (SQL, Oracle) IDT provides Business objects SQL, so that it is common to both DB’s and will be translated to SQL during runtime.
  • Developing  universes in IDT significantly lower TCO (Total Cost of Ownership) for your universes
  • In IDT we can fully test as we go, which helps to change joins, conditions etc.
Cons:
  • No backward compatibility i.e Universes built in IDT cannot be opened or edited in Universe Design Tool.
  • We have to format the objects individually which is cumbersome.
  • If we define a custom format we cannot use the format for other objects. We have to define the format for every object
  • No ability to change dimension to an attribute (detail) or vice versa. Once you define it has to be same you cannot change it. You need to create once again if you need to change it.
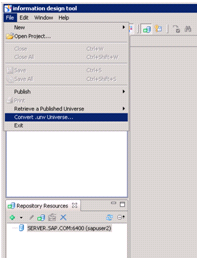
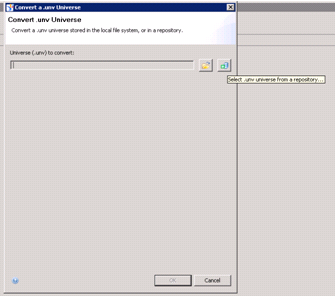
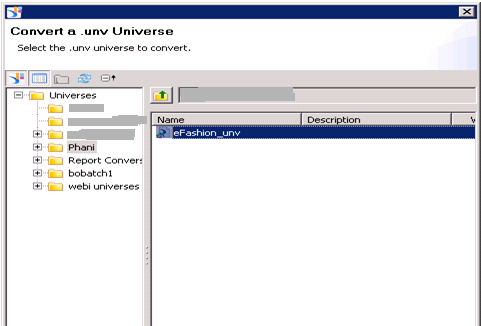
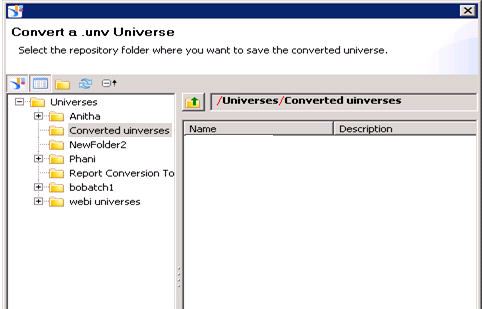
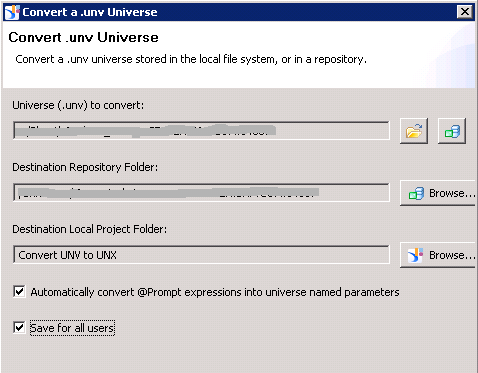
  • When you convert a UNV to a UNX, all the features and definitions (tables, joins, object definitions, security, options, etc.) are converted. There are, however, a few limitations with the UNV to UNX conversion:

    • IDT cannot convert OLAP universes created with prior releases. SAP recommends making a direct connection to the OLAP source to then take advantage of the dimensional modeling capabilities built in to IDT.
    • IDT cannot convert universes based on stored procedures of JavaBeans.
    • Linked universes. Although IDT can convert linked universes they are not supported in BI 4. When you convert a linked UNV, IDT copies the core universe into the converted universe. The core universe factorization is lost.